Friday 31 August 2007

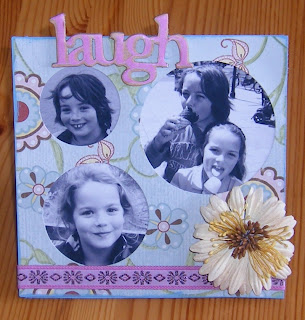
Smile layout

MATERIALS

White cardstock for background
1/2 sheet of any three co-ordinating 12"x12" papers (mine are by K&Co)
Pink ink pad
EK Success piercing tool (see Below)
3 chipboard flowers (I cut mine using the cuttlebug flower die)
Autumn Leave stamp for journalling block
Heidi Swapp stamp for title (or other alphabet stamps for your choice of title)

STEP 1

Cut patterned paper as follows:

Green floral: 4” x 12” and 2” x 4”

Pink floral: 6” x 3”

Pale pink: 6” x 8” and 3” x 2”

Ink edges.

Go round edges with the piercing tool


STEP 2

Stamp title onto white cardstock. Cut out and ink edges. Mount on pale pink or pink patterned paper and cut out again.

Punch out a large scalloped circle from the pink flowery pattern.

Cover the chipboard flowers with scraps of patterned paper. Sand & ink edges.

Cut stems from patterned paper scraps using fancy edged scissors.

Stamp journaling block


STEP 3

Attach papers etc to LO as shown.

Large green paper goes on first, then pale pink, followed by smaller green and pink flowery paper. Then photo on top and embellishments on top again !


Wednesday 29 August 2007

Tidying & decluttering

Have been awol for a bit as we are trying to declutter the house. I picked up a shelving unit from B&Q for just under £35 that is just the right size for 12x12 papers - see pic below. Gradually taking over all of our bedroom for scrapping. DH says he is going to leave a comment on this blog to see if he can garner any sympathy - Ha!


Apart from tidying it has been a quiet couple of weeks. We visited the open day at the wind farm
near Ardrossan but although I managed to remember my camera I forgot to put a memory card in it! Doh!

Have done another couple of classes at the shop - if anyone wants detailed instructions just give me a shout :D

We will be doing a layout based on photos taken in the preceding month on the second Thursday of every month from now on (does that make any sense at all!)
And there will be a (Christmas) project class on the first Thursday of the month starting from September (so a week tomorrow) - phone Julie at the shop if you want to book a place but I think quite a few of the cardmakers are coming along too so not sure if there are (m)any spaces :D


Have got my classes booked for the next Scrapaganza
looking forward to Karen Burniston's acrylic album class and also the Rusty Pickle class.

Saturday 11 August 2007

Busy day of Scrapping

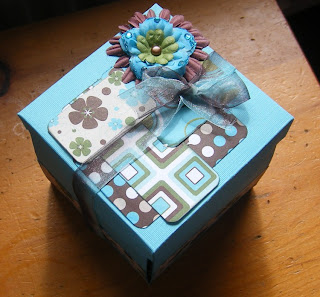
Managed to do lots of scrapping yesterday. Kirsten & I started off making a card (all Kirsten's work) and an exploding box (I helped with the cutting out) for Kirsten's friend's birthday. The paper and cardstock are all from the DCWV stacks (that I got on sale from Sizzix/Ellison online - the card stack was £6 something and the paper stacks were £3.74 each! )


Then I made this fantastic Ribbon & Roll book based on a class over at UK Scrappers. I hadn't made a book using this method before so it was great to learn a new technique. I staggered the tag inserts so they spell Kirsten's name down one side. Paper is from the Primavera range from
Funky Kits


And I think this has to be my favourite class - a mini book designed by Anna from the Pencil Lines blog. Decorated using Roxie papers & embellishments by Elsie Flannigan


Thursday 9 August 2007

Ups and Downs

As in life is full of them!

We had the most wonderful news yesterday that my mum got the all clear from her scan. She has recently undergone surgery and chemotheraphy so we are all absolutely delighted that she is now cancer free.

But at the same time (well actually very late yesterday when I checked my phone) I learned that the head teacher at my children's primary school had lost her long battle with the same illness and had slipped away at the weekend. Her funeral was today.

Anyway back to happier things.

I've been managing to do a bit of scrapping via the UKScrappers summer cyber crop and these are the three layouts I've done so far.


This one of Kirsten's "Puss-in-Boots" face!

This one where Kirsten conned me into letting her have a mobile phone. I was distracted, looking at PJs for her (as I'd forgotten to pack any for her!) when she asked if she could have a mobile phone as it was only £10...I really only heard the £10 bit and as I knew she had more than that of her spending money left I had already said "Yes" before my brain caught up with what she had asked for. Oh well after seeing the look of pure delight on her face there was no way I could go back and tell her no - c'est la vie!
(But she's definitely NOT getting her ears pierced until she finishes primary school - I will be screening all requests a lot more carefully from now on LOL )

I love this photo - Kirsten posing as usual and Kenneth (typical big bro) taking the opportunity to steal her chips!

Double Trouble

As usual I am more than happy for anyone to use the following instructions for their personal use but please do not copy them (either to teach your own classes or to post elsewhere online) without permission.
Thank you :)

MATERIALS

EK Success Grasshopper Cookie patterned paper
White Cardstock
Small piece pale blue textured paper
Small piece pale green velum
Fiskars Star punch
Journaling Pen
Chatterbox Doodling template
Scalloped edge scissors
Hole punch


STEP 1

Cut two pieces from the patterned paper

One approx 2”x12” and one 3 ½” x 12”

Cut one piece from the blue textured paper – approx 2 ½ “x8 ¼”

Cut out the scalloped edge of the green paper and punch holes in each scallop.

Trim the second piece to approx 3 ½”x 11”

Using shaped scissors cut the edge of the blue paper and again punch holes along the edge

STEP 2

Using a pencil trace your title onto a sheet of pale green vellum using any font from your computer.

(I used “Impact” and Angelina)

Use a journaling pen to go over the lines and decorate with doodling etc – add a border if you like.


STEP 3

Attach the paper to the layout as shown but making sure your photo will overlap all papers and the vellum.

The blue paper should be attached over the top of the vellum to hide the glue holding the vellum on.

DO NOT use glue on any part of the vellum unless it will be covered by other paper, photo, embellishments etc

Add doodling using a doodling template or freehand.

To do the journaling I drew the doodled line in pencil first, added my journaling over the top then rubbed out the pencil.

STEP 4

Add further photos if required

Cut three stars and attach with brads to hold the top edge of the vellum flat.

Add further doodling eg stitched edges to the stars, as you prefer


Sunday 5 August 2007

Design Team stuff

I received a wonderful kit from Angela last month which included the gorgeous Scrapworks Florabella papers and rub-ons. Had a ball with the kit and managed to make all of the following, adding very little from my own stash.


First up was a little file folder album to record some of the things we did during the easter holidays (well at least it is Easter 2007! and it was the last time we had a decent run of sunny weather :D )

I used my cuttlebug and the Big Shot Thick cuts file folder die to make the pages (and as the cardstock is double sided I didn't need to make any base pages for the patterned paper), then bound the album using assorted ribbons.

{cover}
{pages 1 & 2}
{pages 3 & 4}

I used my new Autumn Leaves stamps to make the "Completely Loved" title for this layout. The flowers were mostly hand cut then I scribbled (aka doodled LOL ) all over it. And yes I have used this photo before but I love it and I reserve the right to use it as often as I like (***sticks out tongue***) LOL


For this layout I just cut some circles using the Big Shot Circle die and the title is cut using the "Go Slim" dies. I distressed the card stock a bit using one of my Adirondack paint dabbers and added a few prima flowers with some glitter glue for the centre and some journaling on one of the circles.


Then with the waste piece from the circle die cut I made this little photo frame. I painted a piece of chipboard, folded it about 2" from the bottom edge so that it stands up itself and added some photos behind the "waste" piece of paper. Very quick and easy to do.


Then 'cos my cousin is moving into his new home soon I made this card. I hand cut the shapes for the house and cloud, doodled on some stitching and used some Doodlebug Frills for the roof trim and the grass.
And after all that I still have plenty of kit left over :D

Thursday 2 August 2007

All Boy layout

As usual I am more than happy for anyone to use the following instructions for their personal use but please do not copy them (either to teach your own classes or to post elsewhere online) without permission.
Thank you :)


MATERIALS

EK Success Tres Chic papers
Blue cardstock
Doodlebug buttons
Brown ink pad
Fiskars XL punches - circle & star
Alphabet stamps
Brown journaling pen
Tag & pocket template (see below)


STEP 1

Cut the green/dotty paper into two pieces – one 7” x 12”, one 5” x 12”

Put the 5” x 12” piece to one side for now.

Cut the bigger piece as follows:

One 4 ½” x 7”

One 3” x 7”

One 5” x 3”

Cut a 7” (approx) diameter circle from the striped paper (I used a side plate)
and cut the 5” x 3” piece using the same size of circle

Cut an L-shaped border sized to fit your photograph from the brown paper and cut out the scalloped edges.

Ink edges

STEP 2

Cut a tag from the blue background cardstock using your template. Make sure this is cut from an area of the cardstock that will be covered by the patterned papers/photograph.

Cut tag pocket from the green/dotted paper using template.

Ink edges


STEP 3

Attach paper to the blue cardstock as shown.

Dotty paper is approx 1½” from top edge and 2” from left hand side. Green paper is approx 1½” from the bottom edge.

Green “part” circle sits against the dotty paper

And the striped full circle overlaps as shown

Stick photo onto L-shaped photo mat (ink edges of photo).

Make sure that your photo will cover the edges of the green paper top & bottom


STEP 4

Cut 6 circles from the brown paper, 6 stars from the green paper and 1 star from the brown paper using the Fiskars punches.

Stamp title

Ink edges

Fold the tag pocket along fold lines, ink edges and glue in place. Glue on star

Staple ribbon to tag.

STEP 5

Attach title and tag envelope to layout.

Thread embroidery thread through buttons.

Attach button to star on tag envelope and three buttons on right hand side of layout.

Draw a line approx ½” – ¾” round the edge of the layout.


TEMPLATE

Copy & enlarge to fit standard sheet of A4 paper