MATERIALS
Green cardstock
Patterned paper: EK Success Miss Polly's PJ's
EK Success Ringaround a Posie
10" piece pink ribbon
5" piece green ribbon
Fabric flower (double layer)
Bling flower
Heidi Swapp "Fabulous" stamp
TOOLS
Circle Punch or Quickutz circle die
Pop dots
Ink
STEP 1
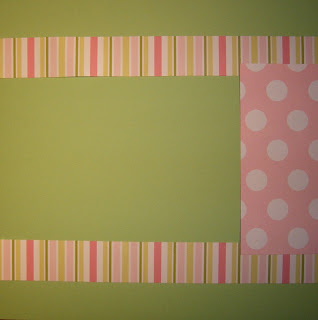
Cut 2 strips of the stripy paper 1 ½” x 12” (the stripes should go across the way as shown)
Cut 1 piece of pink dotty paper – this should be approx 3” wide and the height should be the same height as your photograph(s).
STEP 2
- The 2 narrow strips should be about 1 ½” from the top and bottom edges of your layout.
- the pink dotty paper should be placed against the right hand side of your layout midway between the two strips (this will overlap the striped paper);

STEP 3
Add your photographs as shown (below).
DO NOT GLUE the edge of the photograph nearest the dotty paper.
DO NOT USE GLUE in the middle of your photographs…
…as the photos will make a pocket for your journaling tag.

STEP 4
Cut out some flowers from the other side of the pink dotty paper and attach the “half” flowers to the edges of your layout and against the stripy paper as shown.
Use pop dots to attach the “whole” flowers for added dimension.
Tie two pieces of ribbon together and attach along the lower edge of the photographs using double sided tape.

STEP 5
Add fabric flower and sparkly centre using double sided tape.
Use Quickutz die or circle punch to cut two circles from the green paper and attach to the middle of the pink journaling tag. (If you are rounding the corners of you tag do t
Cut a small strip of stripy paper to cover the edge of your journalling tag – (trim one (long) edge with scalloped edged scissors if you wish)
Attach stripy paper and round corners of journaling tag if you wish. Slip tag under photos.


1 comment:
Have tagged you, see my blog
Post a Comment