Thank you :)

STEP 1 - Lid
Cut green cardstock into a square 6 1/8” x 6 1/8”
Score a line 1” from each edge
Score a diagonal line across each corner.
Fold along scorelines and glue corners in place with wet glue. (use paperclips to hold in place until dry)
STEP 2 - box
Cut blue cardstock into a square 10 ½” x 10 ½”
Score green cardstock (ie 12"x12" sheet) at 4” horizontal and vertical to give nine 4” squares.
Score red cardstock at 3 ¾” horizontal and vertical to give nine 3 ¾” squares.
Score blue cardstock at 3 ½” horizontal and vertical to give nine 3 ½” squares.
Cut the four corner squares off each piece of cardstock so you are left with a cross shape.
Round corners and ink edges
STEP 3
Cut four 3 ¼” squares from patterned paper A
Cut four 3 ¼” squares from patterned paper B
Cut four 3 ½” squares from patterned paper A
Cut four 3 ½” squares from patterned paper C
Cut two 3 ¾” squares from patterned paper B
Cut two 3 ¾” squares from patterned paper C
Round corners & ink edges
STEP 4
Attach patterned paper to box as shown.
I used two different patterns on each layer and placed them opposite each other.
Join all three pieces together – use double sided tape – attach to red cardstock only.
STEP 5 - decoration
Cut a 3 ¼” square of red cardstock for the centre. Round corner and ink edges.
Attach a couple of small squares of patterned paper and emboss a Christmas pattern on the pale blue cardstock using the Cuttlebug.
Attach ribbon round red cardstock before attaching to base.
STEP 6
Cut four 4” strips from the red cardstock and emboss with snowflake embossing folder.
Attach to outside of box.
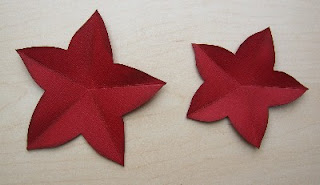
Cut two poinsettia flowers out using the template and join together using a gold brad.
Cut a small square of patterned paper to decorate the lid (round corners/ink edges)


5 comments:
Great instructions - thank you!
What a talented lady! I was wondering if you sold pre-made kits, so us "less talented at home" would have the right dimentions, to put together ourselves? If so would you please let me know? Thanks Wendy
wmcclendonx7@bwmail.us
this really helped me with my school memoir project!
Great project i have scene in this blog. I like this exploding box and the instruction are also give me help to make this one.
this really helped me with my school memoir project!Thank,s for so informative post.
Plastic Card.
Post a Comment